|
Creative Paperclay stone floor technique:
I first heard of Creative Paperclay when super talented artisan Rik Pierce recommended I use it for the Spanish
style dollhouse he designed for me to house my bakery (which I hope to finally create very soon, using the Buttercup
kit). I tried Paperclay and have been in love with this product ever since. There is no limit to what you
can do with Paperclay, and it is especially suitable to simulate stonework. Here is the technique I used to achieve
the effect.
|
| Click on picture for larger view |
|
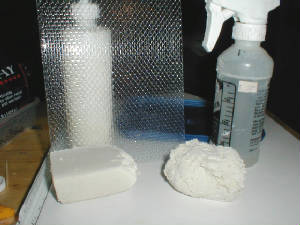
To make the floor I used Creative Paperclay, white glue, spray bottle filled with water, and a pattern sheet
to emboss the stones (brick pattern sheet shown, can't find the stones right now). For best results, make
sure the Paperclay is well mixed/kneaded. If mix becomes too dry while shaping it, spray or brush on a
bit of water and knead again. I like to add some white glue to the Paperclay mix--I feel it minimizes cracks while drying.
|
| Click on picture for larger view |
|
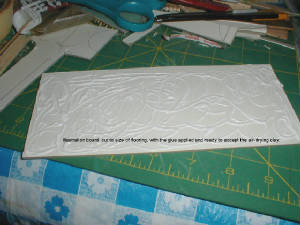
I used illustration board to cut floor. Spread on white glue liberally. Since I
added glue to the Paperclay I did not bother to spread the glue, but you can use a piece of cardboard on its edge
to spread it evenly over surface.
|
|
| Click on picture for larger view |
|
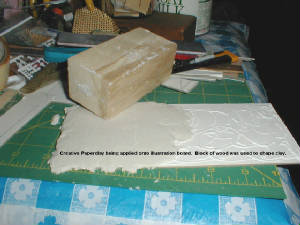
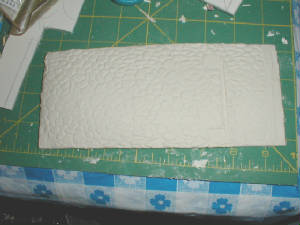
Spread over illustration board . Pat down and/or spread flat with rolling pin or large block of
wood. Note: Because I wanted an uneven surface (which is usually the case in very old floors) I decided not to
use the technique of placing stripwood on both sides of the Paperclay and using a rolling pin to obtain a nice even surface.
|
| Click on picture for larger view |
|
I used an embossed pattern sheet to press on the stonework, but you can use a stylus to etch on the design.
I pressed on the balcony base to mark where I will have to cut later. Allow to dry thoroughly. I let it dry for
at least 48 hours.
|
|
| Click on picture for larger view |
|
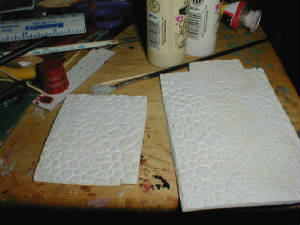
I had tried a terracotta finish but decided to change colors. I painted on a coat of white paint
(using a fan brush to get into all the nooks and crannies). I then spread a small amount of antique white paint
on a foam brush, removing excess by dabbing on paper towels. I pounded the brush on the stone floor with
a flicking movement of the wrist (like cracking a whip), making sure I only covered fractions of the stones.
|
| Click on picture for larger view |
|
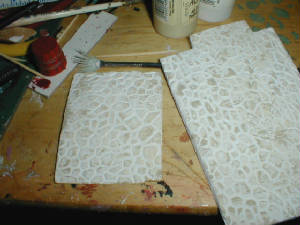
I repeated the previous step, only this time I applied medium gray, followed by light gray.
Again, try to overlap colors just at the edges, not covering any one completely.
|
|
| Click on picture for larger view |
|
Repeating the previous step, I now added some yellow. Some purple came next
(sorry, forgot to take photos of that step) and then some lavender. I then applied some midnight blue
paint and finished with some stoneware blue (which is a nice blue-gray).
|
| Click on picture for larger view |
|
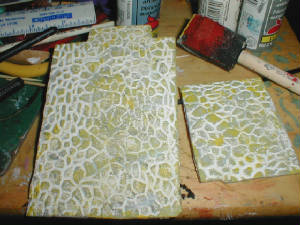
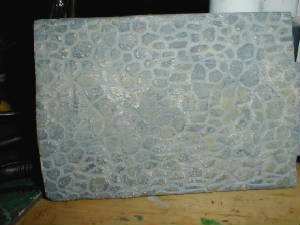
After all the colors were applied I mixed some gray with white and applied it with a fan brush, making sure
the depressions were covered with the mixture. I then used a wet wipe to rub the stonework. At this point it looks
messy, but once you take a dry cloth (a dried out wet wipe works fine) and rub the excess paint from the stones you end
up with what you see here. The floor has an aged, well used patina and the colors are all blended nicely.
|
|